

Transferring Embroidery Designs With Sulky Fabri-Solvy - A Tutorial
In a ranking of “Most Fun Things About Embroidery,” transferring the design onto your fabric ranks, well….at the bottom. You just want to get to the stitching, I know! There are many ways to transfer patterns onto fabric, and there isn’t one perfect solution for all designs. But there is a relatively new way to transfer patterns, and it’s pretty revolutionary.
(The pattern shown here is my “Bluebird of Happiness” pattern, and you can find it in the Lolli & Grace Etsy shop HERE.)
Sulky’s Sticky Fabri-Solvy (the name is a mouthful, right?) is a stick-on/wash-away stabilizer. And here’s how it works:
1. First you have to get your design onto the stabilizer. There are two ways to do this:
-You can cut a piece of stabilizer, lay it on your pattern and trace it by hand with a pencil (and the use of a lightbox or even a bright window). This is a great plan for small or relatively simple patterns. Trace your design on the stabilizer side, not the shiny paper side.
-You can actually PRINT your pattern onto the stabilizer. It is available in 8 1/2″ x 11″ sheets, which will fit right in your ink-jet printer. I bought a long roll of stabilizer that is 8″ wide, so I just cut a piece that was 11″ long. Set your printer to “draft” so there is less ink, load the stabilizer into the printer with the correct orientation (so it will print on the stabilizer side, not the shiny side) and print. Success!
2. Once you have the pattern printed, cut around the design with a fairly wide margin so there’s plenty of stabilizer to stick to the fabric around your stitching. Peel off the paper backing and adhere it to your fabric. I don’t like to have the stabilizer pressed between the inner and outer rings of my hoop, so I stretch my fabric in the hoop and THEN stick on the stabilizer. My “Bluebird of Happiness” pattern has the 6″ circle as part of the pattern, so you can simply cut on the circle and align it on your stretched fabric, like this:

3. Fun part ahead….start stitching! Even though there is an adhesive on the stabilizer, I did not experience any sticky residue on my needle. Occasionally I carefully rubbed the needle between my fingers, but even that wasn’t really necessary.
Here’s some stitching in action:
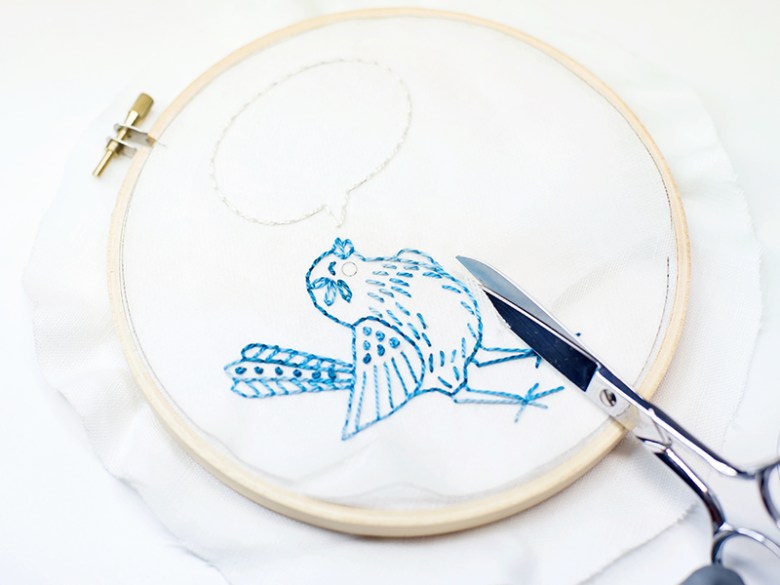
4. Now you’ll want to trim away some of the excess stabilizer around your stitching. This takes a little bit of concentration, patience and good light (and if you’re like me, some reading glasses). Peel up as much of the stabilizer as you can and CAREFULLY trim the excess. Smaller embroidery scissors work well for this. Be really sure before every “snip” that you’re cutting stabilizer and not fabric or stitches. (I suppose you could take the fabric out of the hoop for this step, but I find that having the fabric stretched helps to keep it out of the way of my scissors.) And it’s not shown in this photo, but I usually have my non-cutting hand under the stabilizer just ahead of where I am cutting to hold the stabilizer away from the fabric. You do not have to cut right next to your stitching, nor do you have to cut away any sections that are hard to reach. For this pattern, I did not cut away the stabilizer inside the speech bubble.
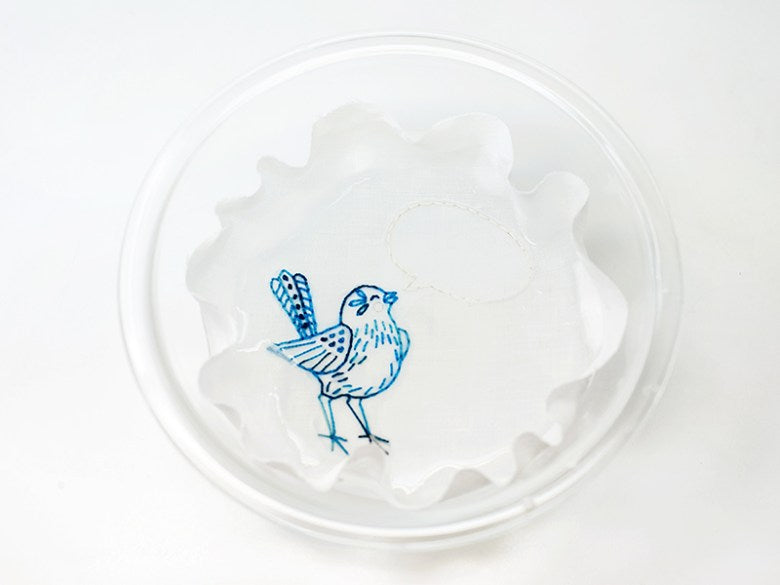
5. Once you’ve finished trimming the stabilizer, take the fabric and stabilizer out of the hoop and place it in a bowl of cold water. Cool water out of the tap is fine. This is why BEFORE you do this, make sure your threads are colorfast. Some of them will say they are colorfast on the label. But even if they say they are colorfast, I would still do a quick test just to make sure. Make a few simple stitches on a small piece of the fabric you want to use, dunk it in cold water and let it sit for a few minutes. Press it between two white paper towels, and maybe even rub it just a little. If color comes off on your fabric or the paper towel, I would not use wash-away stabilizer to transfer your pattern. But once you know all is well, here’s what it looks like as you soak your fabric:
Let it sit for just a few minutes. Soon you will begin to see little white bits of stabilizer floating in your water. You can gently swish the fabric around, but I also just take it out of the bowl, rinse it off and maybe let it soak in some clean water for another minute or so. Here you can see the stabilizer starting to dissolve:
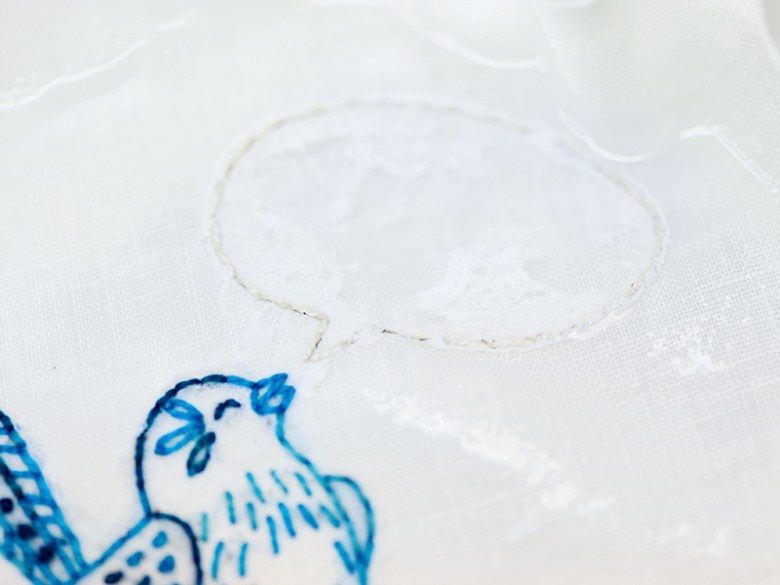
At this point you can gently rub the fabric with your finger, or even carefully scrape between smaller stitches to help the stabilizer come off. Just be gently with your threads. Rinse well under running water.
6. Once all of the stabilizer has dissolved, lay your fabric on a clean folded towel and press it with another folded towel. Press on it to soak up as much excess water as possible. Move to a dry area on the towel and repeat. Move your fabric to another clean, dry towel and let it dry flat. Although, to be honest, I’m usually in a hurry, so I will carefully clip my work to a hanger and let it dry outside if it’s a nice day.
7. Put the fabric back in the hoop, stretch it tightly and then finish the back with whatever method you prefer. You can find the PDF pattern for the “Bluebird of Happiness” in my Etsy shop by clicking HERE:
Here’s the finished hoop:

I hope you enjoyed this tutorial – give Fabri-Solvy a try!