
Lolli and Grace Thread Painting Stitch Along - Part Three
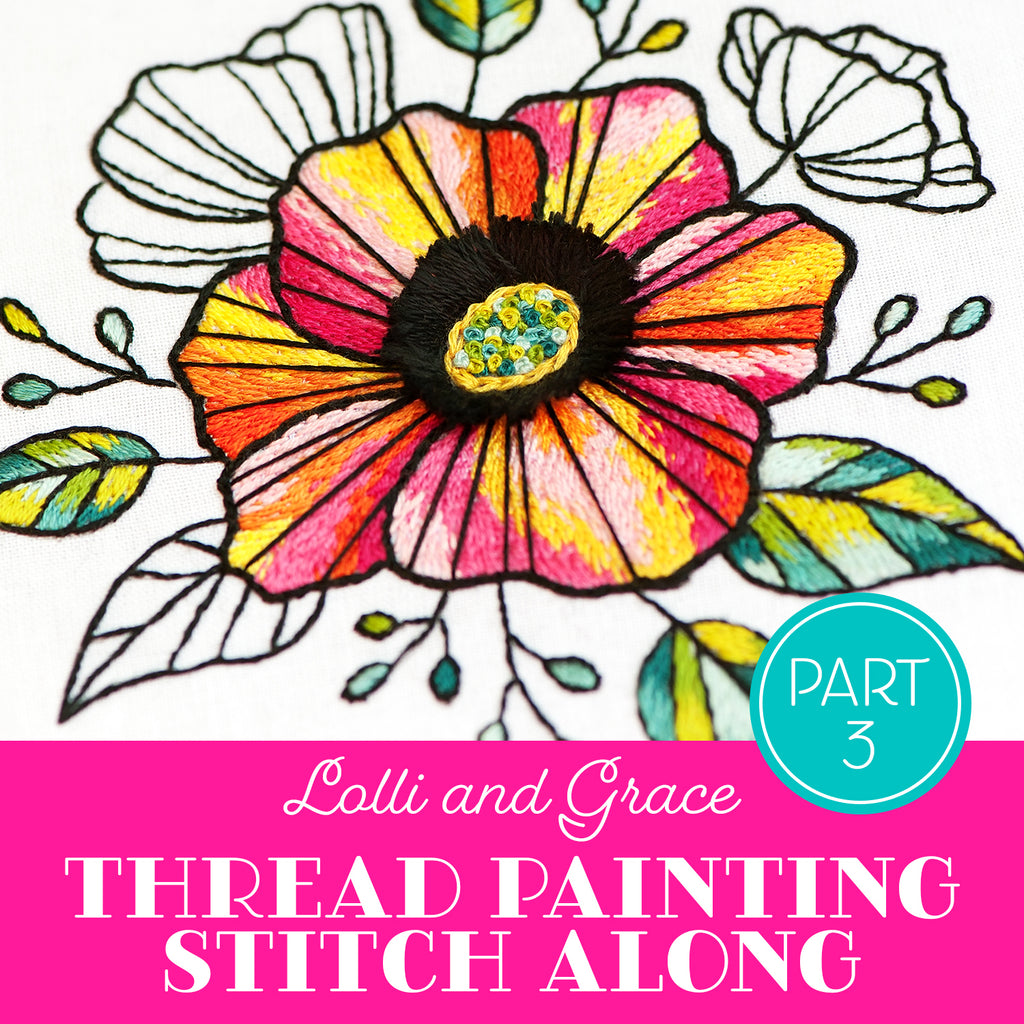
We are finally at the centerpiece of the Lolli and Grace Thread Painting Stitch Along – the flower! It’s all needle painting for this part, and I find it to be some of the most relaxing type of stitching – just lots of straight stitches and pretty colors blended together. Once you get the hang of it, this is the perfect kind of stitching to do while you binge-watch Netflix or listen to music.
If you would like to see how to stitch the previous sections of this design, click on one of the links below. You’ll find the PDF pattern, the supply list and the instructions for getting started on this design in Part One. We stitched the leaves in Part Two:
Lolli And Grace Thread Painting Stitch Along – Part One
Lolli And Grace Thread Painting Stitch Along – Part Two
Thread Painting The Center Flower
Each petal of the main flower is needle painted in a very similar manner to the leaves. But whereas the leaves were basically rectangular shapes, each colored section of the petals on the flower are wavy, curvy shapes.
This is where subtly changing the ANGLE of your stitches becomes important.
You will start stitching each section essentially the same way you started a section on the leaves – by making rows of staggered stitches, working back and forth across an area until is is completely filled. Continue filling in the first section all the way down towards the center of the flower.
Make your stitches short enough so that as you work your way down the wavy shape, you can subtly and gradually change the angles of the stitches. You want them to all flow together – if your stitches are too long, it will be difficult to get subtle angles.
To help you blend the colors on the long sides of the shape, make several random stitches that are placed in the section next to the one you are currently stitching. This allows a little bit of your first color to be mixed in with color next to it.
Here is the break down of each step:


Thread Colors For Part Three
- 605 Cranberry Very Light
- 602 Cranberry Medium
- 600 Cranberry Very Dark
- 726 Topaz Light
- 728 Golden Yellow
- 3853 Autumn Gold Dark
- 720 Orange Spice Dark
Flower Color Chart
To print out this color chart for hand reference while you stitch, right-click the image below and open it in a new tab or a new window. From there you can print it from your computer.

***
I used 2 strands of thread for all thread painting on the flower, but you can also use 3 strands if you would like for this part to stitch up a little faster. This will make the flower a little bit more textured, but it will look just fine that way.
***
Video Tutorial For Part Three
Here is the video tutorial that will show you in detail how to complete Part three:
Next up in Part Four – the center of the flower, where we will use 3 very different and interesting stitches. I hope you will join us for that!